blank'/> Penny Ward INK: June 2013

Jun 30, 2013

Happy July 4th


Hello my peeps....my friend and Design Team sister Greta reminded me that July 4th was this coming week...where did the time go? I had this little lady colored with Copics, so added her to some of the new Authentique Pride patterned paper, added a couple of grommets and veneer stars and she is ready to lead the way to the Independence Day parade.


I don't use a lot of Digi's, (I am a stamper, you know). But when I do, I always turn to TiddlyInks or Mo Manning, as I just love their images. 
The dotted edge is actually a die set from LilInkers called Stitched Mat....LOVE!!!!

Thanks for stamping by.....

                                                       
                                             Follow on Bloglovin

Jun 28, 2013

You are my reason why.


Hello friends....Are you ready for the weekend? Do you have crafty plans for the next few days?
I love making cards for our deployed soldiers and if you want to get in on this terrific organization, just go here to read all the do's and don'ts of their cardmaking requirements.
Today I am playing along with their Clean and Simple challenge.
This card is also entered in the Simon Says Stamp Anything goes Challenge.


Bright Pink card stock stamped and heat embossed. Ran my Scor-Bug around the edges and mounted to a Light Pink card stock. Liquid Pearls for flower centers (I always flatten my dollops of Liquid Pearls after they are dry...for some unknown reason, I just like that look).
This card was so quick to make, you could make a dozen of them in less than 30 minutes.

Thanks for stamping by today....

Let's go Shopping:
Light Pink & Bright Pink card stock (Michaels)
Stamp: Petal Party (Penny Black), Simply You (Technique Tuesday)
Scor-Bug (Scor-Pal)
White embossing Powder (Imagine Crafts)
Flamingo & White Opal Liquid Pearls (Ranger)


Jun 26, 2013

Thanks so Much


Hello.....Playing along today at Operation Write Home with their Sketch challenge

and Simon Says Stamp anything goes.

Stamp set is Hot Rod by Penny Black and includes several sentiments to go along with the beautiful car stamp.


As you can see, I stamped the car three times with different color ink, then cut into strips to go along with the Sketch. Fishtail piece is popped up on foam adhesive.

Thanks for stamping by.....

Let's go Shopping:
White, Black & Terra Cotta card stock (Michaels)
Stamp: Hot Rod 40-224 (Penny Black)
Inks: Versafine Black, Memento Peanut Brittle (Imagine Crafts) & Cup O' Joe, Orange Soda (Hero Arts)
White Embossing Powder (Imagine Crafts)
Adhesive Enamel Dots (Colorbok)
Jute (Home Depot)


Jun 25, 2013

My Best Friend


Hey friends...are you being crafty today? Made this little cutie for the Penny Black Stamp Squad, now thinking I need to find a challenge to submit to....

How much are you loving this aqua blue embossing powder on Chocolate Brown card stock?
I guess this is my new favorite color combo!!!

Flowers were stamped and heat embossed with white onto Aqua Blue card stock and matted with Chocolate Brown. 


Die cut around sentiment, and layered over the cutest pom pom ribbon.

Thanks for stamping by.....

Let's go Shopping:
Ultra Thick Card Stock (Simon Says Stamp)
White card stock (Wausau)
Aqua & Chocolate Brown Card Stock (Michaels)
Die: Radiant Rectangles (Spellbinders)
Aqua Embossing Powder (Michaels)
White Embossing Powder (Image Crafts/Tsukineko)
Mini Pom Pom Ribbon (May Arts)
Scrap Happy Glue (The Rubber cafe)
Foam Adhesive
Grand Calibur (Spellbinders)


Jun 19, 2013

Sweet Wishes


Hello friends....a simple card today (I needed something fast for a birthday).

Super easy to recreate...
Ink just edges of your card base.


Attach a white panel on top, and stamp your sentiment.
Cut two panels from white card stock, stamp, color and adhere leaving the opening for your sentiment.

Hope you are having a wonderful crafty day!!!
Thanks for stamping by....

Let's go Shopping:
Ultra Thick White card stock (Simon Says Stamp)
Water Lily & Friendship (Penny Black)
Memento Paris Dusk & Black inks (Tsukineko)
Clear embossing powder (Tsukineko)
Copic Markers (Imagination International)
Faux Blue Pearls (Michaels)
Foam Adhesive


Jun 15, 2013

Penny Black Blog Hop


Hip, hip, hooray!  Welcome to the first ever Penny Black Stamp Squad blog hop

Not only are we hopping, we're giving away stamps, too!  Leave a comment on each blog, including the Penny Black blog, for a chance to win a selection of Penny Black stamps.


You should have arrived here from Judy's blog. To start at the beginning of the hop, click here.


So excited to be a part of the Penny Black team and to spend this Saturday with you!

This card was selected as a Favorite of the Week at Splitcoast Stampers

So .....  let's make a card...


I just love how white embossing looks on Kraft paper, don't you?

I stamped Kisses in the Sun on to two panels of Kraft card stock measured 4 x 5 1/4 inches each. I then cut the second panel into three pieces, matted them in white, then attached to base card with glue and foam adhesive. 

The sentiment is from the Friendship Transparent set, stamped and heat set with White embossing powder.


Cut White Ultra Thick card stock to 4 1/4 x 11 inches, fold in half. Adhere Kraft panel.
Stamped and heat embossed just the butterfly on a scrap of Kraft card stock, fussy cut and adhered to card front.
Add faux pearls and pearl hat pins for a finishing touch.

Hop along and meet the rest of the Stamp Squad.
Your next stop is:

Penny Black Blog
Greta 
Lin
Judy
                     Penny (you are here)


If you find a broken link, you can return to the beginning of the hop HERE.


I would love for you to follow my blog by clicking the link at the upper right corner and don't forget to leave a comment at each stop for your chance to win Penny Black stamps.

Thanks for hopping by....

Let's go Shopping:

Faux Pearls (Michaels)
Pearl Hat Pin (Michaels)


Vintage or not……

Hello friends….. today is my last post as a guest designer at The Rubber Cafe. I have had so much fun playing with their stamps.
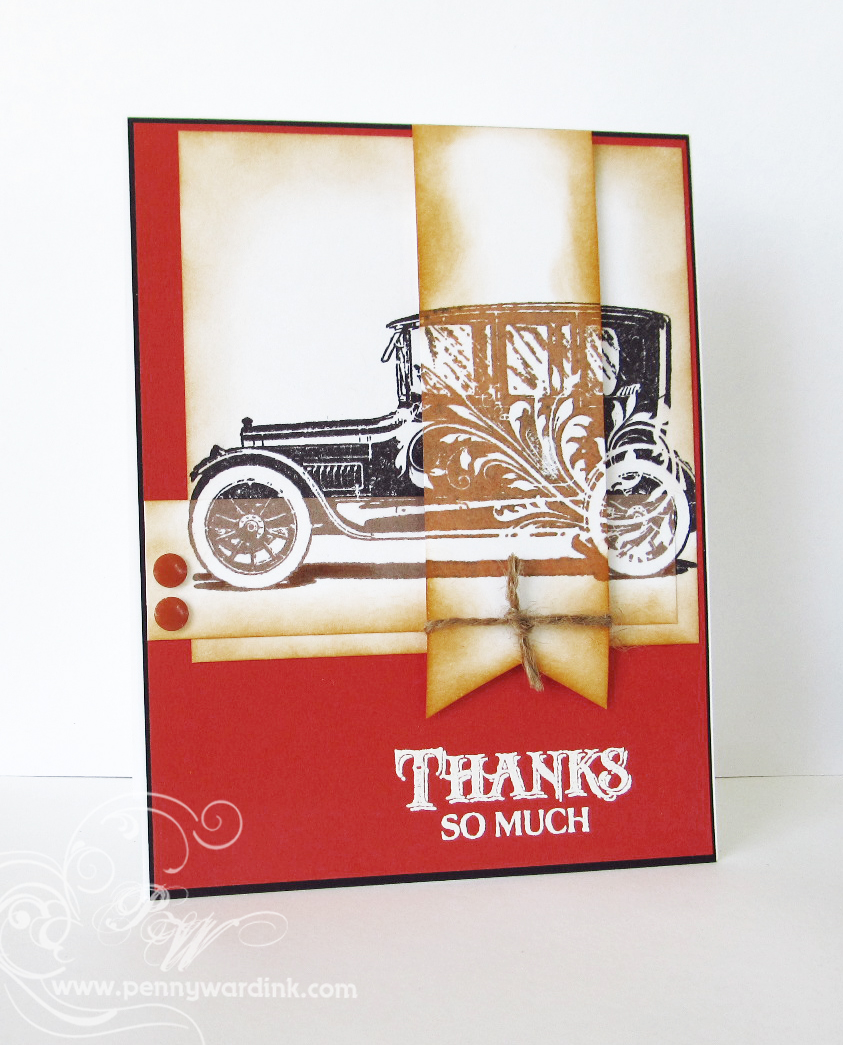
 I have a tag and a card for you. I wanted something vintage looking and something modern from the same stamp set. And this Vintage Treasures Set was a great way to achieve both looks.

Let's make something...


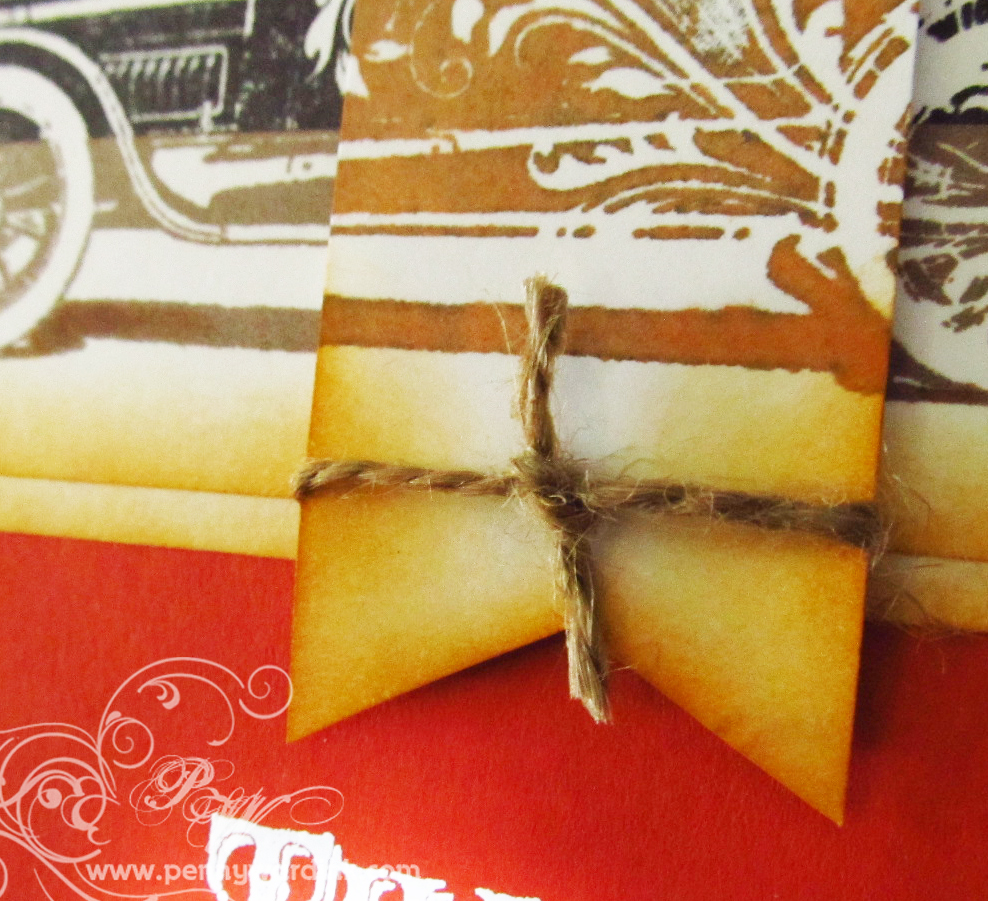
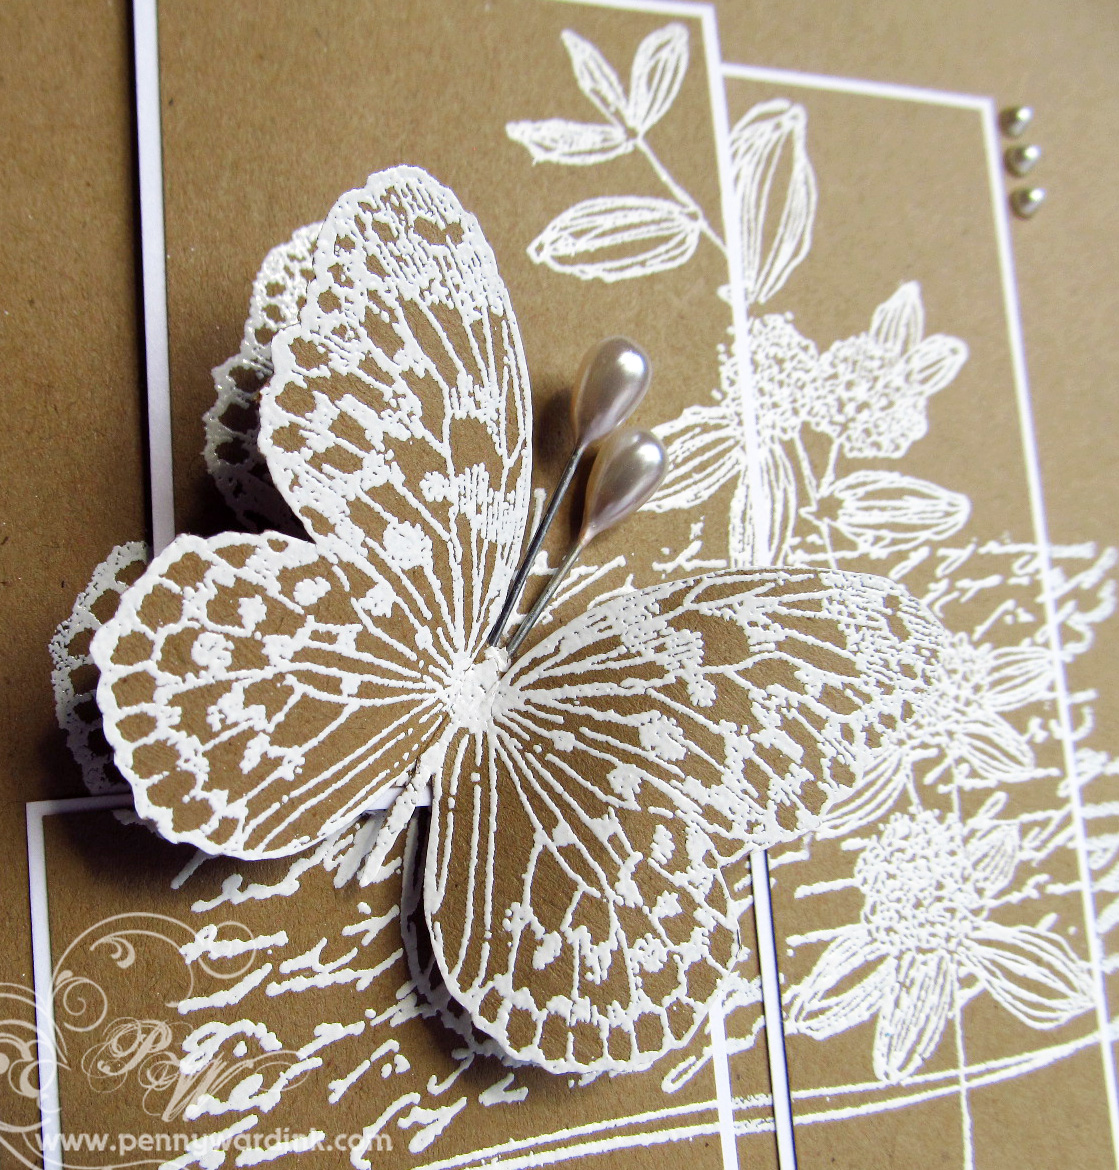
I love how this tag turned out. The background was stamped with the receipt stamp, then I masked off all but a small sentiment on the larger stamp in the Vintage Treasures set.


I am really kind of liking this sentiment that I stamped and heat embossed on the tag after inking it with distress inks. I also inked and fussy cut the clock and the butterfly. The “Thanks” sentiment was stamped, then die cut and adhered to tag over the lace.


Did I happen to mention how much I love this Vintage stamp set?!?


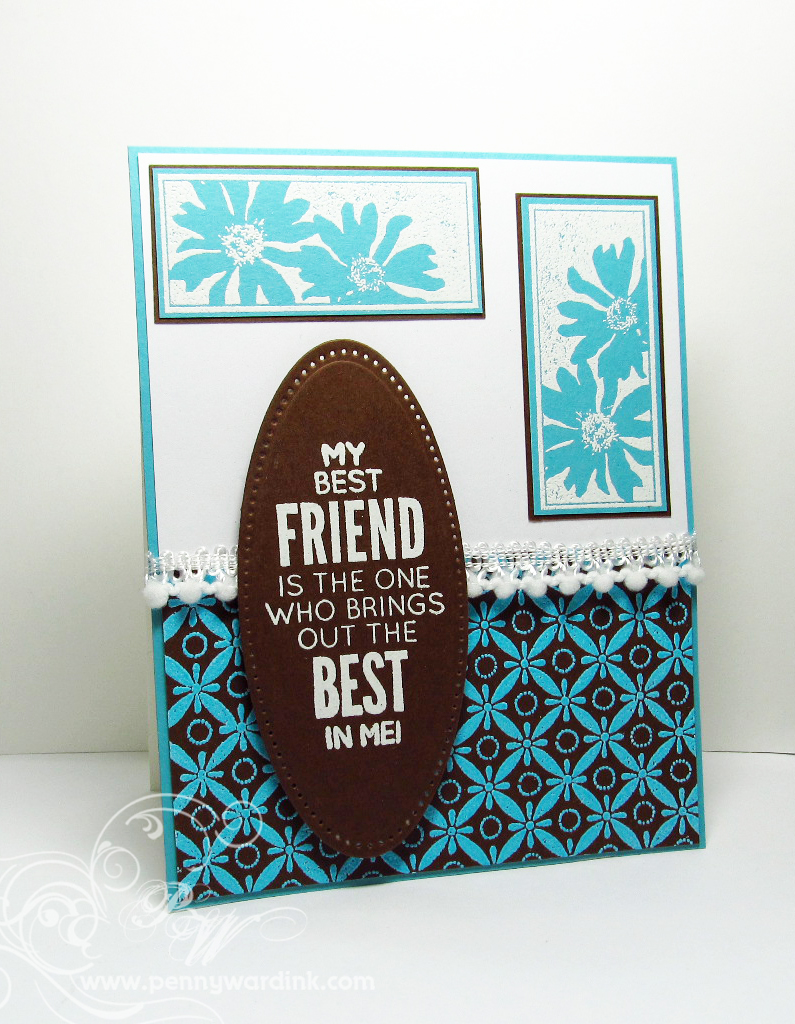
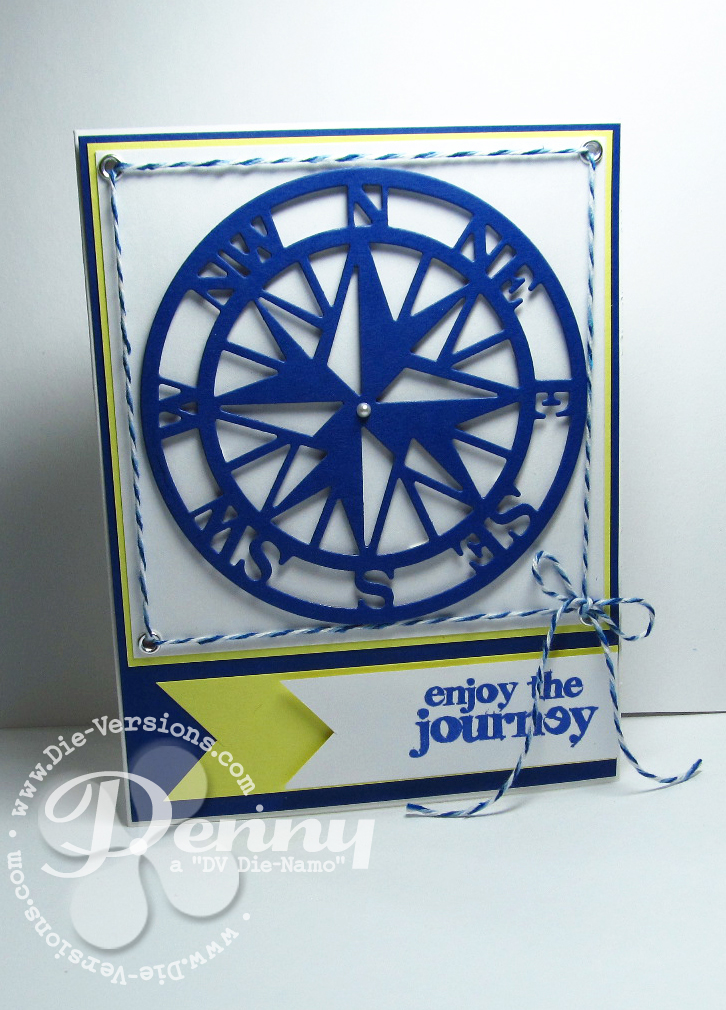
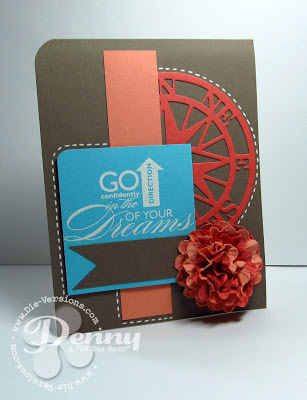
Next I made a card with bright colors and a fun fold.


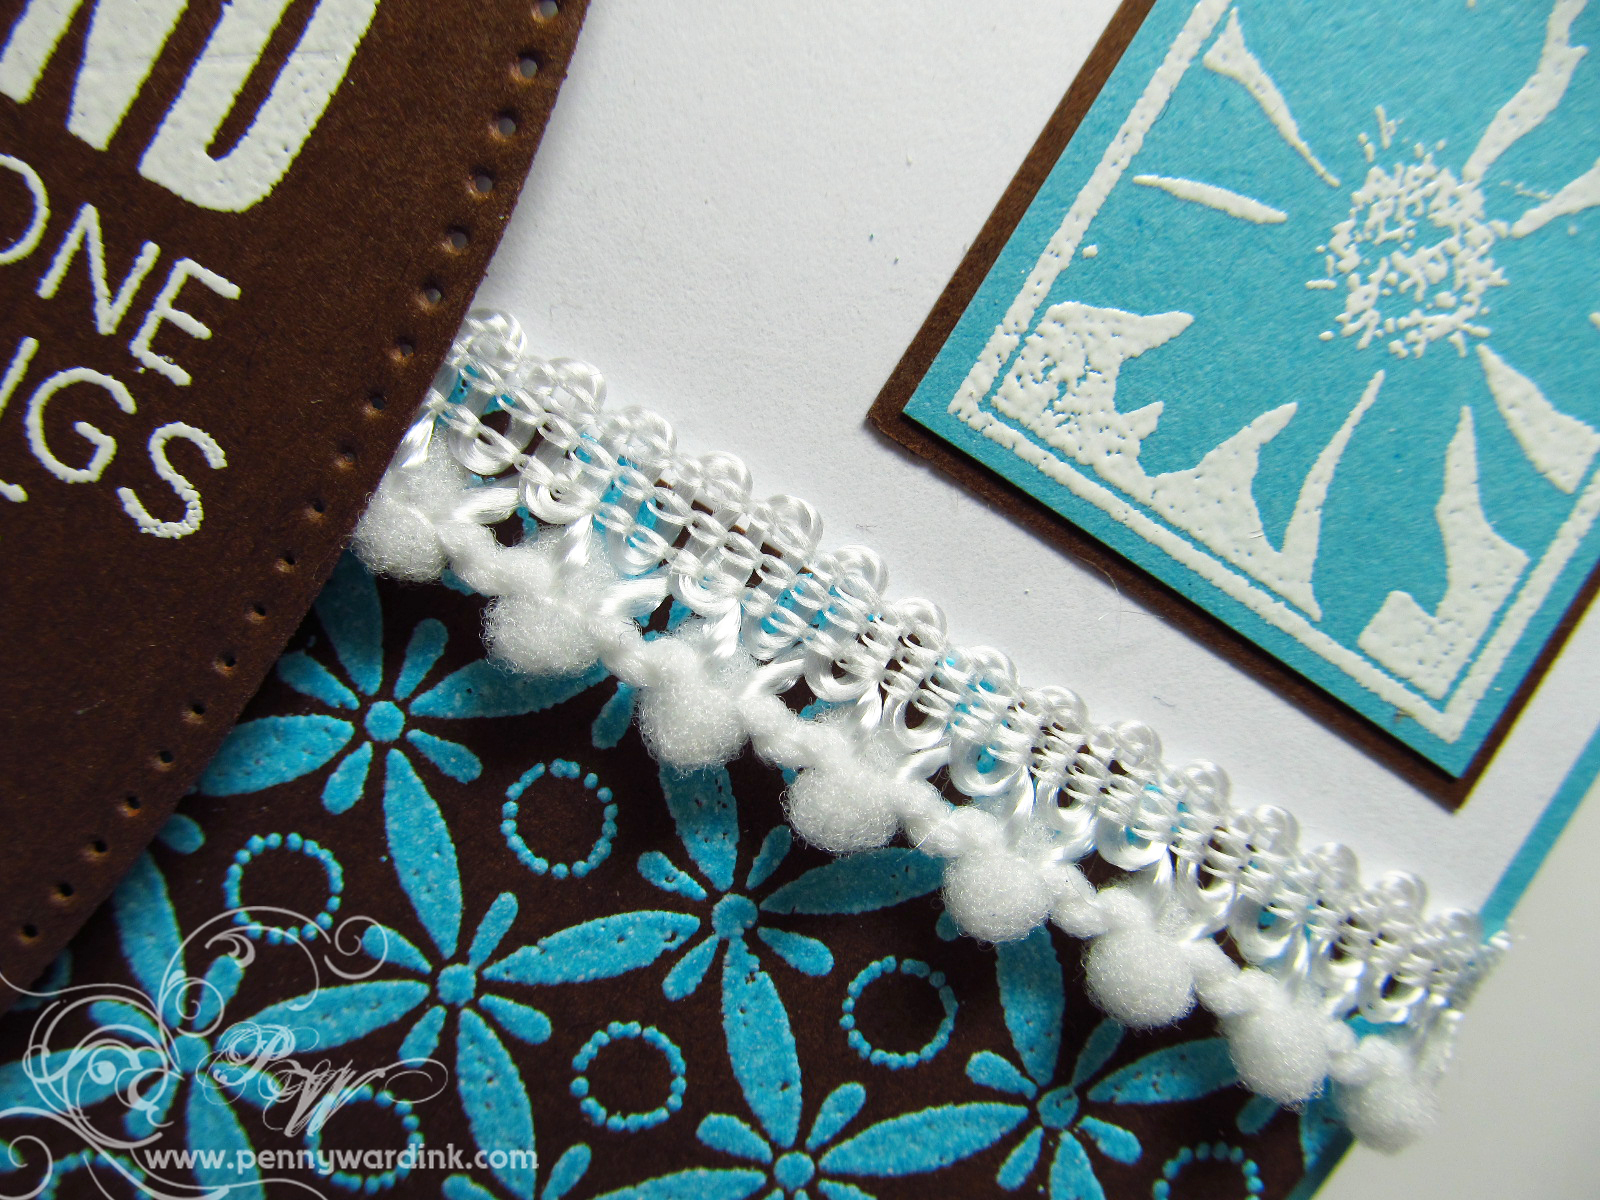
Bright Blue, Lime Green and Yellow making this card appropriate for a man or a woman.
To make a similar card, you want to cut a card base 7 1/2 x 5 inches. Score halfway on the long edge. Cut a strip of card stock at about 1 1/2 by 4 inches.


Adhere a small section of this strip to back of card so about 2 1/2 inches fold to the front of the card. Attach a butterfly, flower, button etc. so the strip can be tucked just enough to keep the card closed. Attach all of this to a piece of card stock that measures the standard 4 1/4 x 5 1/2 inch size.


Decorate along the way as desired.

Thank you so much for letting me share a little of my card making with you. I hope you return to this blog often for more creative inspiration. 

Thank you again to The Rubber Cafe team…I had a blast.
Many Hugs & thanks for stamping by…

Let's go Shopping:
Ultra Thick white card stock
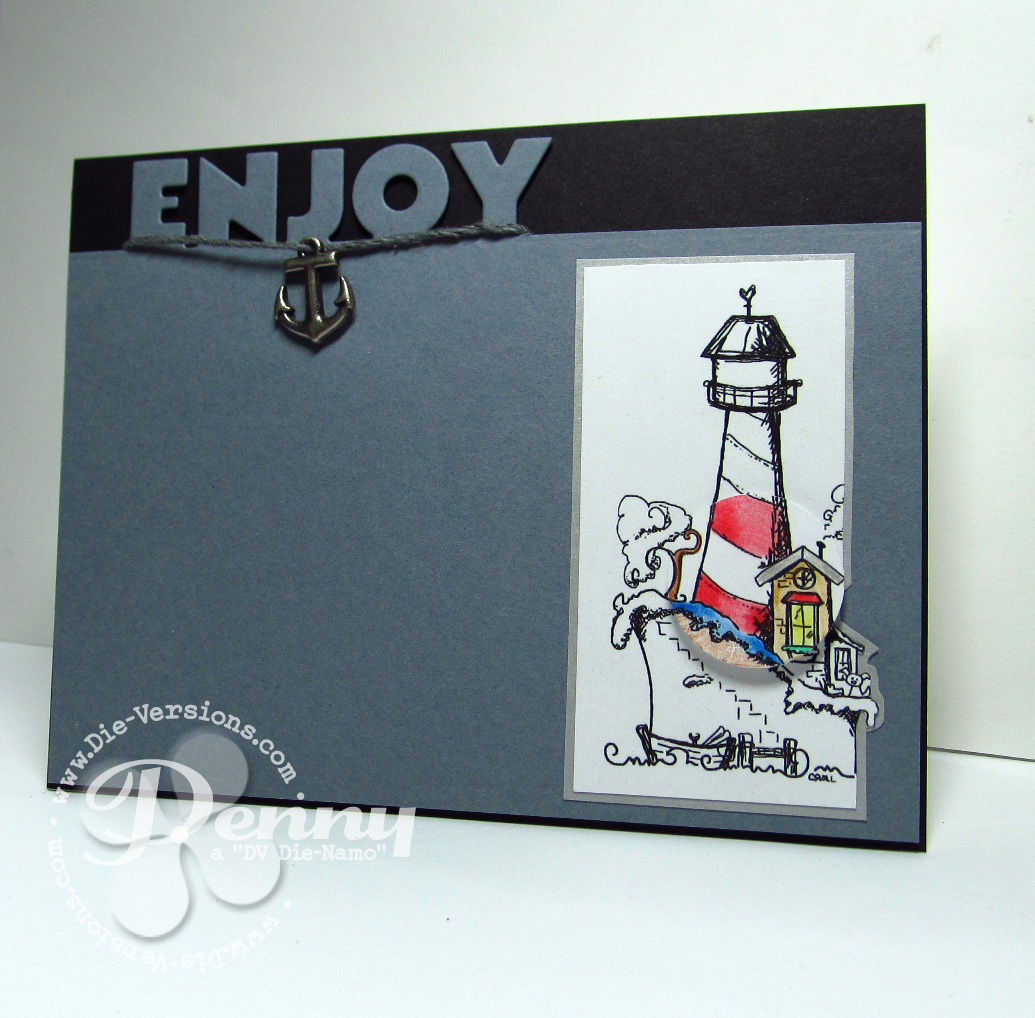
Dies: Ornamental Tags One (Spellbinders), Tide Pool Font (Die-Versions)
Inks: Rusty Hinge, Peacock Feathers, Salty Ocean, Mowed Lawn, Mustard Seed (Ranger)
Memento Black (Imagine Crafts/Tsukineko)
Liquid Pearls: Royal Blue, Key Lime & Dandelion (Ranger)
Ribbon
Twine
Faux Pearls (Michaels)
Lace
Round Colored Head Pins
Yellow Glitter Glue
White Gel Pen (Signo Uni-ball)
Foam Adhesive
Scrap Happy Glue (The Rubber Cafe)


Jun 14, 2013

Penny Black Announcement


Give me a Y, give me an E, give me an S
what do you have...
YES

Finally the day is here... 
A couple of months ago I was invited along with 4 others to join the Penny Black family... and I had to keep it a secret.  But today I get to do a happy dance (and a few cartwheels) and share with you that I am one of the new Designers for the Penny Black Stamp Squad. I have loved Penny Black stamps since I started making cards, and it is such an honor to be selected for this team.
I am in awe of the fantastic designers that I have the privilege of working with.
YES!!!

Want to see what I made for the announcement?

You only get a sneak peek ...


Head on over to the Penny Black Blog to see the full reveal of this card.

Make sure you check out the Penny Black Blog on Saturday June 15th.
  (Pretty sure there are prizes involved :)

As always...thanks for stamping by as I love to read your encouraging comments. Please leave your email in the comment section if you would like a reply to any question.


Jun 10, 2013

Nautical Journey


Hello my peeps.... Can you tell how much I love this On the Trail die by Die-Versions?

Today's card is rather nautical looking....have you noticed this as a new trend in card making? Or maybe just because it is summer? I don't know the answer, but I can tell you I am loving it!!!

After die cutting the Trail die I popped it up with foam adhesive onto white card stock. Matted with yellow and adhered to a standard size Navy card stock. Used my Crop-a-dile to set eyelets at the corners, then threaded Navy & White twine.
Stamped the sentiment  and cut a couple of strips with a fishtail end.

Thanks for stamping by....


Jun 9, 2013

Go Confidently


Hey fiends....do you have graduation cards to make? As my children are getting older, I found myself only needing one card for a sweet young man this year. 

I love how the On the Trail die goes perfectly with the sentiment (Word Play by Stampin' Up).

The flower is made by using a scalloped circle punch (5 times), layer and affix a brad, wet, scrunch each "petal" around the brad. Let dry and gently pull layers backwards.

Hope you are having a wonderfully crafty day!!!

Thanks for stamping by....


Jun 7, 2013

Get the most of an Express Edge Die


Hey friends....do I have a treat for you today. I have been playing around with Die-Versions new Express Edge die called Enjoy Life. You can use the die as intended with both words OR you can carefully snip across either word to make the die work 3 ways.


Now I must admit that the coloring technique is not my idea...I saw some inventive card maker take a black and white image (Lighthouse by TiddlyInks), stamp twice and color just a small portion, then use a circle punch and adhere it to the card. So cute!!! 


The Enjoy Life edge die was snipped carefully to just say Enjoy.


And for the rest of the die.....


"Life" was added to this Polaroid frame. Rest of sentiment is from Unity Stamps and image is Tree-mendous by Penny Black. Some red & white twine and a cute little button...done!!


Thanks for stamping by.....


Jun 6, 2013

Choo Choo


Howdy peeps.... When I was sent this super cute Train die by Die-Versions, I knew I wanted to use it for something in the grandsons room. How cute is this die?!?

Instructions for the Tissue box cover are here.

Before assembling the box, I inked it with Memento Sky Blue, then stamped and heat embossed the "steam" (Dot Flourishes by Inkadinkado). I also added White Enamel Accents to the steam dots.
I die cut the Train in white, then colored with Copic markers.

The font at the top is Tide Pool by Die-Versions.
(when working with individual die-cut letters, it is so much easier to run them through the Xyron, then adhere them. No more glue where you don't want it).

I hate to say that I don't remember where I found the instructions for the Engineers hat, but I googled it. (hint, hint...you need to do the same).

Thanks for stamping by...